Creating Hyper Casual Mobile Characters
Learn how to create unique character designs for hyper-casual mobile games using custom AI training. Discover how to train models, dial in settings, and generate consistent character assets at scale.
Overview
Creating unique character designs for a hyper-casual mobile game can be easily achieved through customized training. For studios and teams that want to quickly iterate new character concepts, this is a powerful workflow that allows for the prompt generation of a vast array of characters. Additionally, you can tightly control the proportions using ControlNet Depth, which provides a more efficient pace and output than was previously achievable.
Follow along as we walk you through the process of training a custom model for character generation.
The 4-Step Process
You'll go through the following steps:
- Gather your training images
- Dial in the settings
- Embed Prompts
- Create your assets
Step 1: Gather Your Training Images
When considering your dataset, aim for 15-20 images in the style you want to achieve. It can also be helpful to include a few images that are in a similar but not exact style to create more flexibility in the final model. Give the AI a diverse array of types to learn so that it can easily dial in the specific style while also understanding a variety of concepts.
You can download the dataset for this model by clicking here

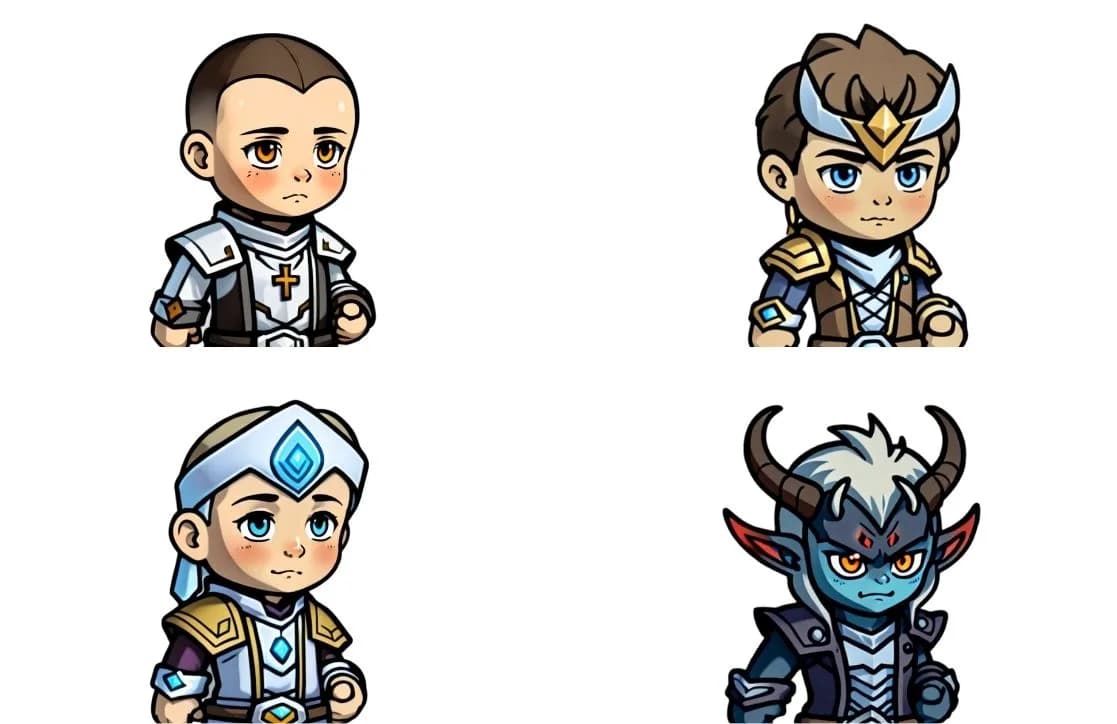
Hyper Casual Mobile Characters
In the dataset provided, you can see we have a monster, sci-fi heroes, fantasy heroes, East Asian warriors, farmers, etc. This diversity in the dataset will allow you to prompt a wide array of outputs on the finalized model.
Step 2: Dial in the Settings
While Scenario offers sophisticated auto-captioning which we used to train the final result, it is always a good idea to review all of your captions and correct any blatant errors or improve them. Remember, you'll want to describe everything that you:
- Want to be able to specifically prompt for later
- Do not want to be an inherent part of a generation unless specifically prompted for
You may need to follow a process of training, testing, and re-training. For instance, with this dataset, the initial results using the Style preset showed signs of under-training.
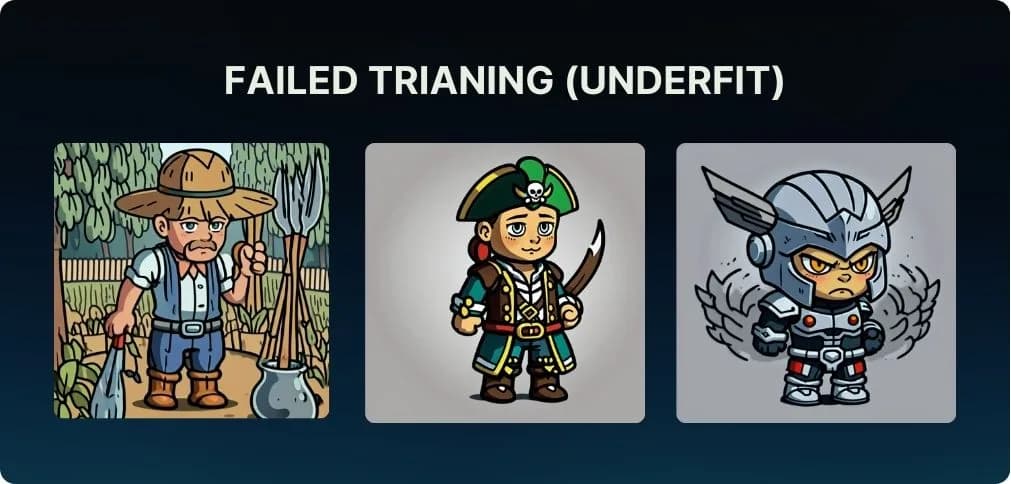
Hyper Casual Mobile Characters
Notice that the style wasn't really fully learned by the model. As well, the model that resulted using the default settings didn't respond great to a variety of prompts; which indicates the text encoder is also under-fit.
So, when retraining this model, we want to follow a methodology of going "lower and slower." When you do this yourself, make small incremental adjustments and test your results. For this dataset, we tuned the settings to increase the total number of Training Steps (thereby a slower training) from 5,250 all the way to 7,500. We reduced the Text Encoder Learning Ratio from 0.25 to 0.1 (a lower setting).
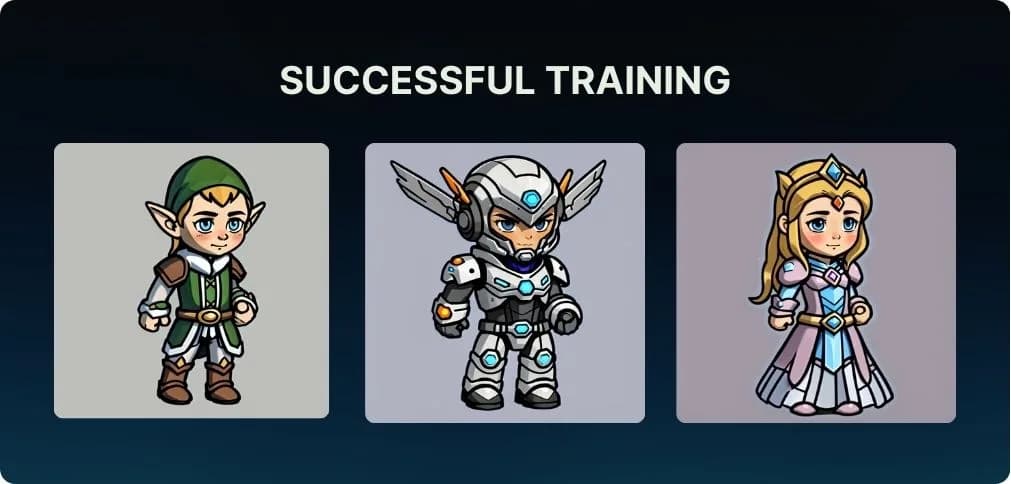
Generation sample for a successfully trained model
Step 3: Embed Prompts
Based on the captions used during training, there are often prompts you will want to use every time to ensure consistent outputs from the model. Scenario will also gather and suggest these as options based on the captions you provided at training time. These can be accessed via the Prompt Builder on the inference page or reviewed under the details tab of the model's page.
In our example, the captions include the word "character" often, so we will embed this prompt to guide the model into evoking the style that it learned connected to the word "character." We will also embed the prompts "solo" and "no background" to prevent artifacts and extra characters in each generation. Once we have the embeds dialed in, we are ready to create or choose a reference image for the proportions and create our Asset Pack.
Embed these prompts: character, solo, no background
Step 4: Create Your Assets
You can either generate some characters until you find the proportions you are looking for, or choose an example (it can be from your initial dataset) to use as a reference. We have provided a reference we used here: Download the reference image
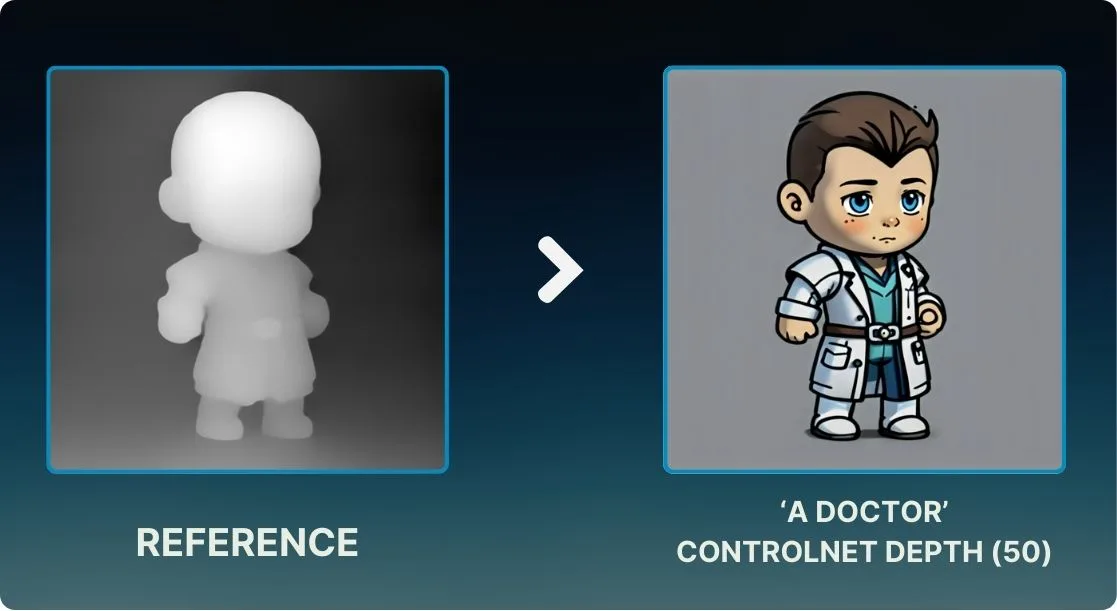
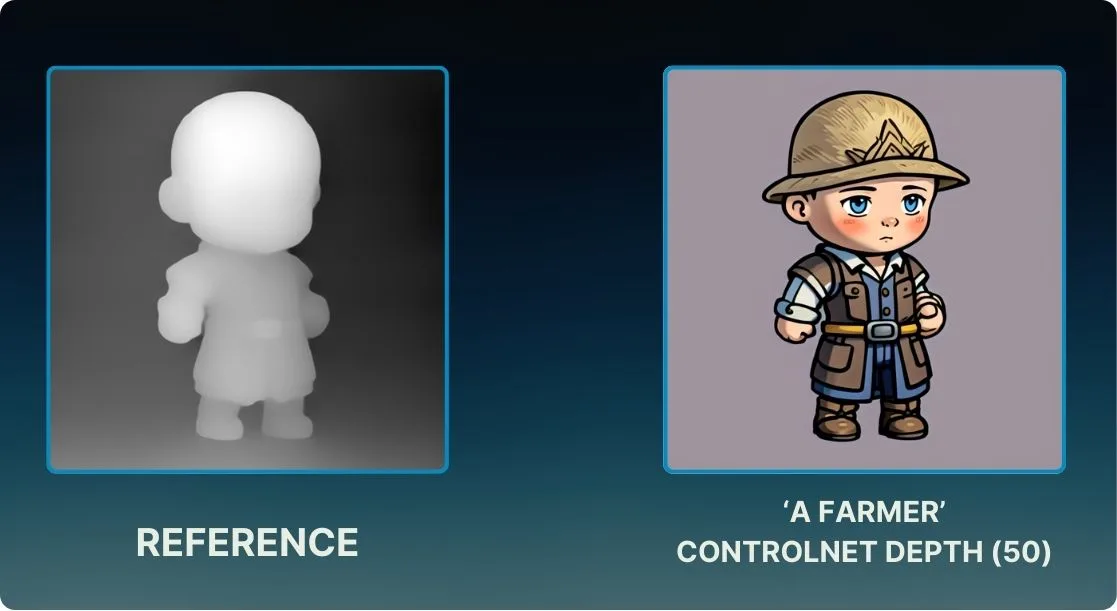
Depth map vs Depth map based generation result
Input the reference image on the left panel and choose ControlNet. Then select the Depth mode. If you use the depth map we provided above as your reference image then unselect Mode Mapping. Start at influence 50 and dial in this setting as necessary. Lower influence will allow the model more freedom to create while a higher influence will more strictly adhere to the depth map.
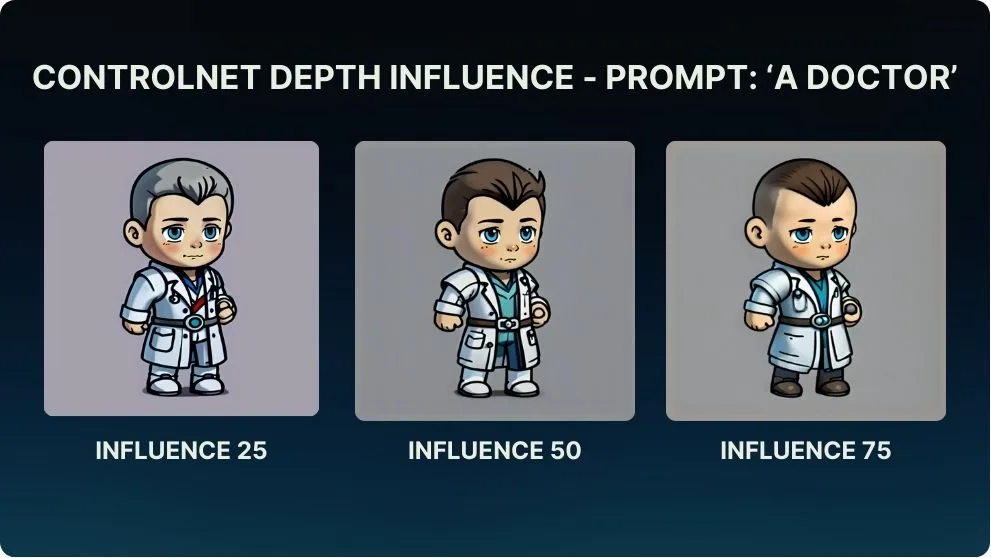
Impact of ControlNet Depth influence
ControlNet Depth mode will provide the necessary proportional information without adhering too strictly to the reference image's line details. This will also ensure your outputs are centered.
Example Prompts and Results
Try using simple prompts to get you started, such as these examples:
'a zombie'
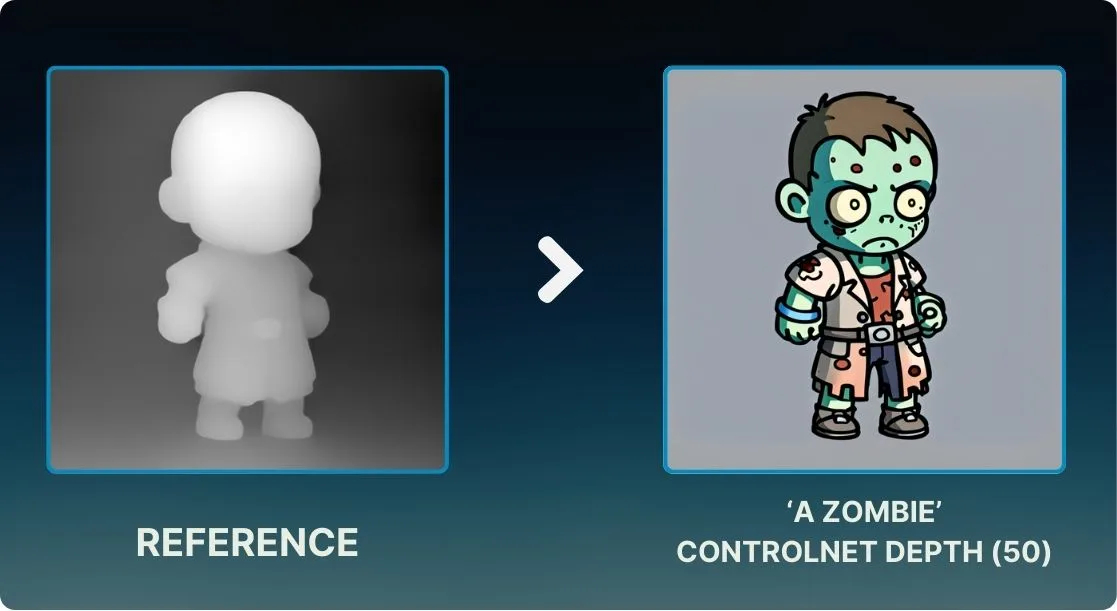
A zombie character generated with the trained model
'a ninja'
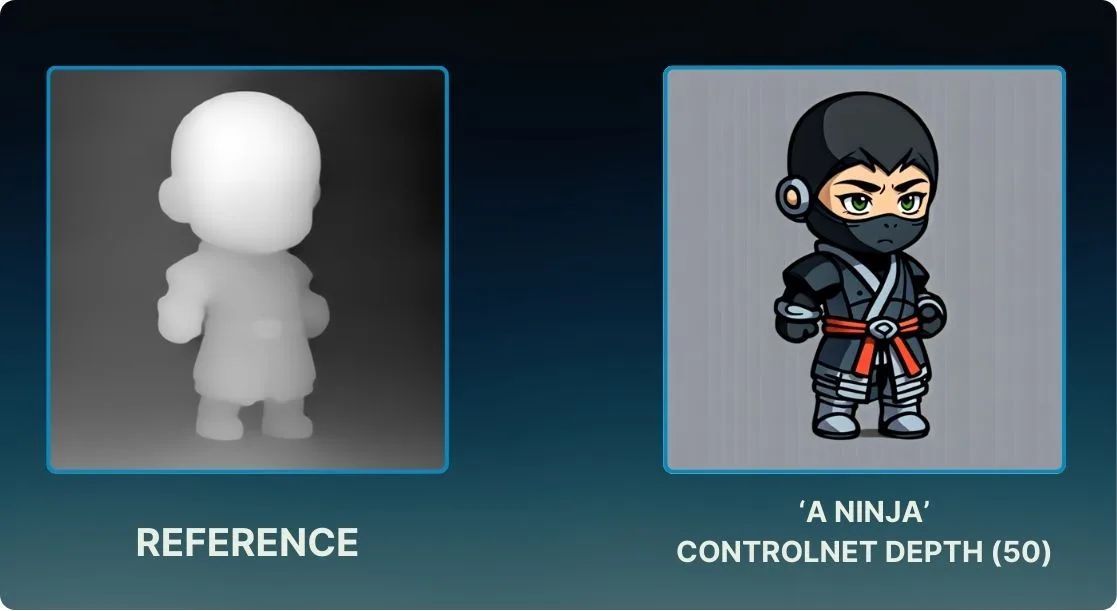
A ninja character maintaining consistent style and proportions
'a pirate'
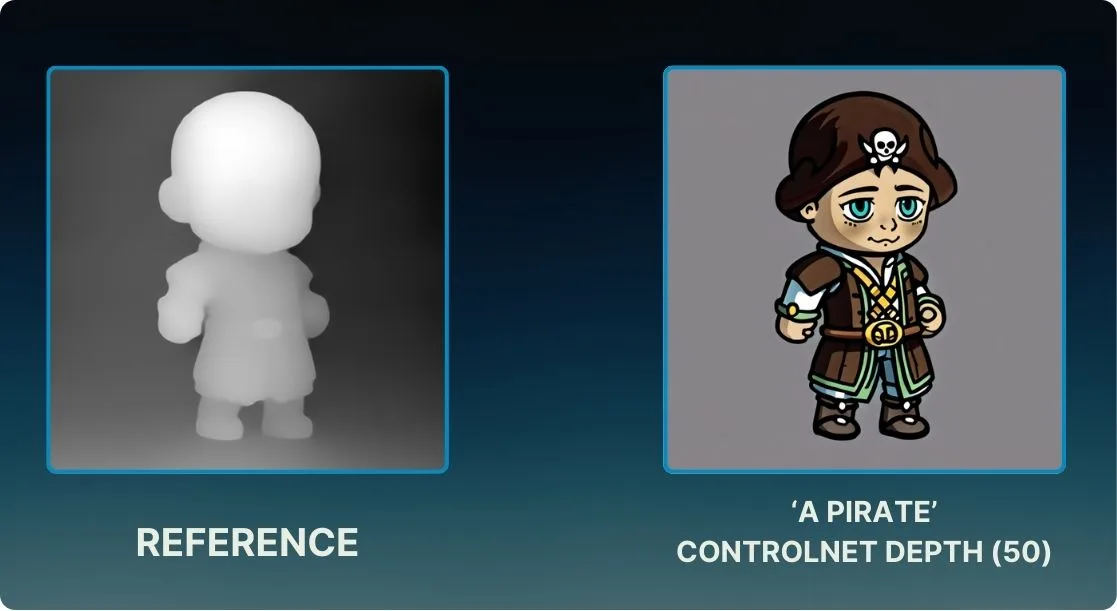
A pirate character with the same visual aesthetic
'a farmer'
A farmer character demonstrating style consistency
You can download an asset pack we created with the provided reference by clicking here
Remove Background
To ready your assets for final export, consider taking advantage of our Background Removal feature. Simply click on the image you have created and find Remove Background on the right hand panel. Indicate whether you would like a transparent background or if you would like a consistent color before clicking the button.
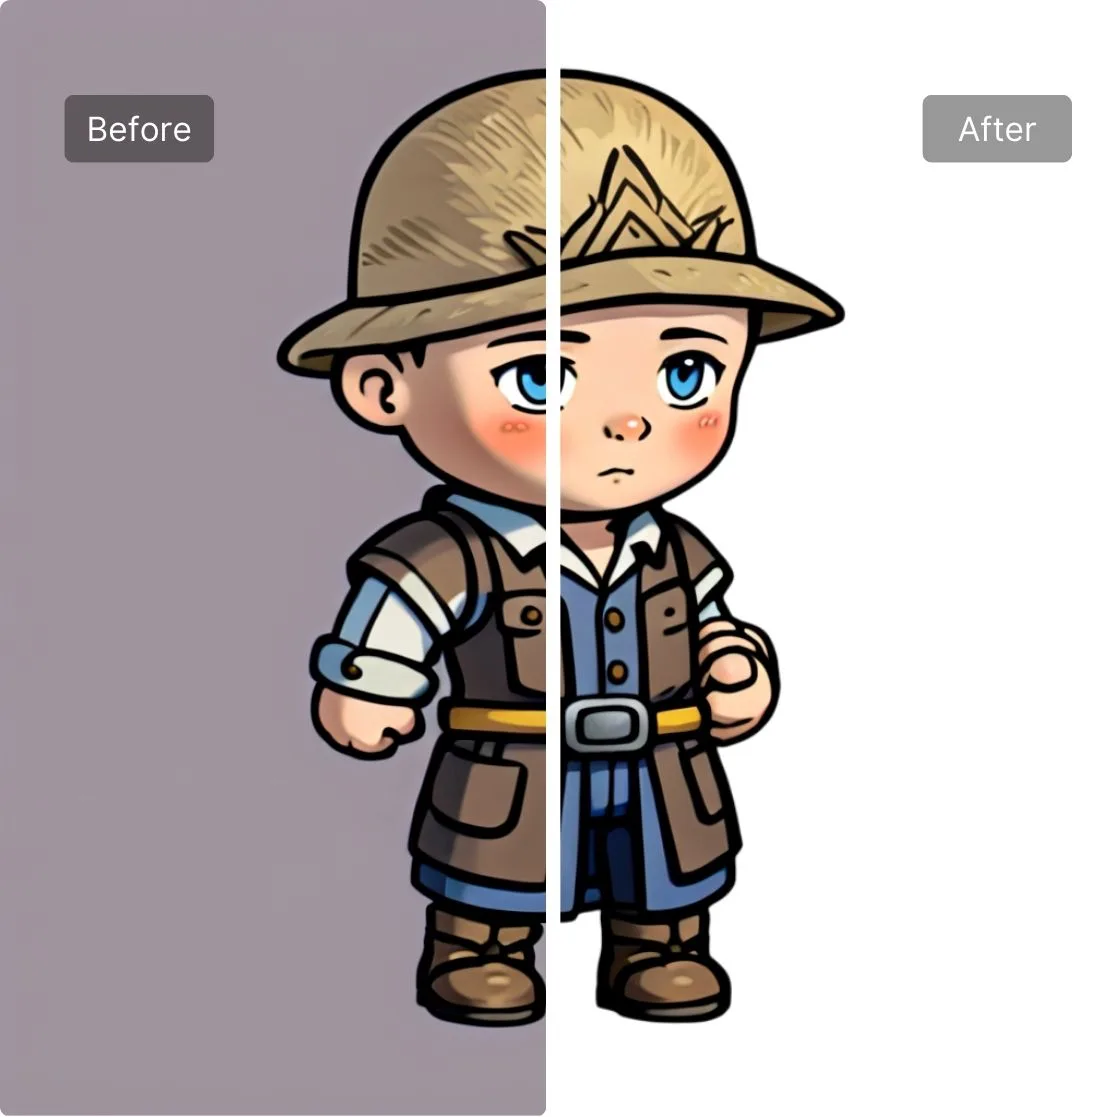
Remove Background
Conclusion
By fine tuning a custom model and iterating on it to dial in settings, you can identify the correct prompt embedding and control these through thoughtfully captioning your dataset. You can then easily pump out assets and control their proportion to create more efficiently than ever before.
This tutorial demonstrates how Scenario's AI training capabilities can revolutionize your character design workflow, allowing you to generate consistent, high-quality assets at scale while maintaining full creative control.
Start Creating Characters Today